
Ductwork
7 ductwork details that decide whether a system pulls well or not at all
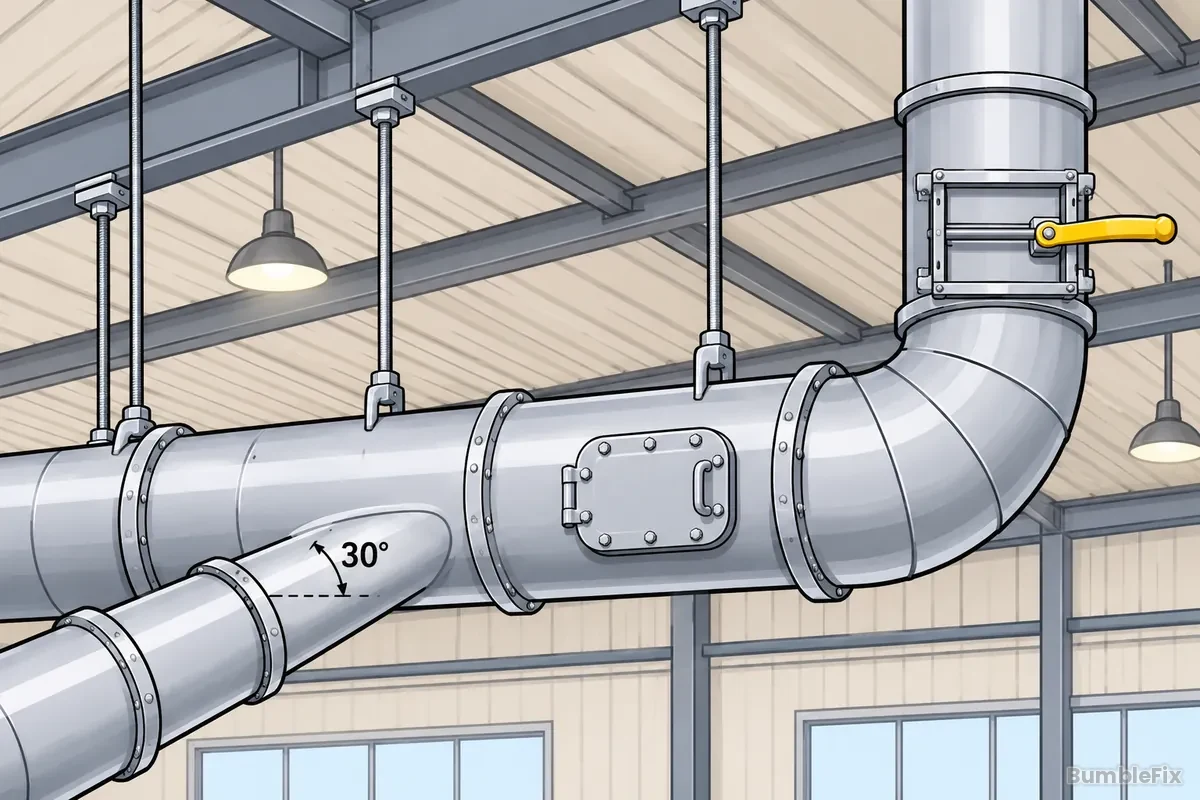
A well-calculated system can still fail because of small details during installation. Sharp elbows, branches that enter the main at right angles and fans bolted straight onto an elbow all lose airflow and add to the power bill. Here is a seven-point checklist based on industrial duct design practice.
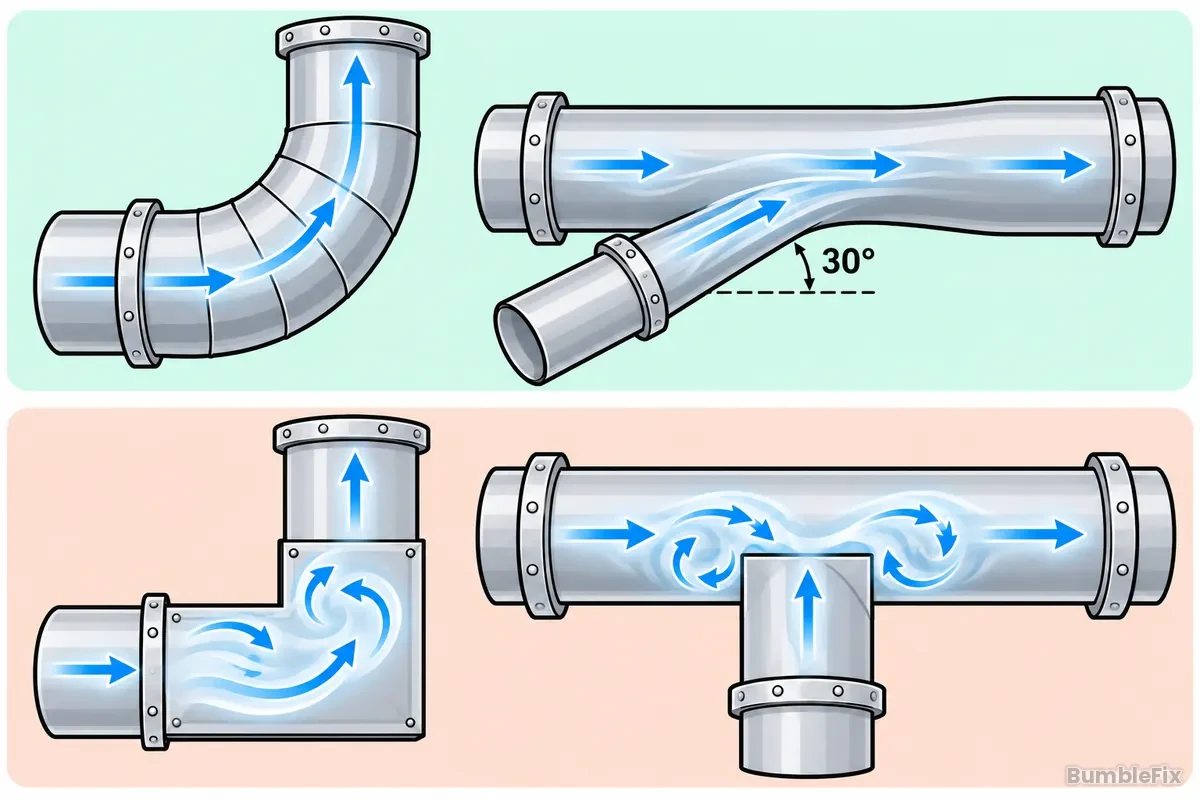
1. Elbows should have a generous radius
The centreline radius of an elbow should be 2 to 2.5 times the duct diameter, and larger still for highly abrasive dust. A 90° round elbow should be made of 5 segments for ducts up to about 150 mm and 7 segments for larger ducts. Elbows should also be at least two gauges heavier than straight duct of the same size, because that is where dust strikes hardest.
2. Branches enter the main at an angle, not at 90°
- Branches should enter at 30°, and no more than 45°. For highly abrasive dust a smaller angle may be specified.
- Bring the branch in at an expansion of the main duct, and connect it to the top or side of the main.
- Do not let two branches enter opposite each other at the same point on the main, or the airstreams will collide.
3. Change duct size gradually
Contractions and expansions should be at least 5 units long for every 1 unit change in diameter (5:1). Avoid connecting a large duct straight to a smaller one with an abrupt step, and use symmetrical Y-branches rather than one-sided ones.
4. A straight duct run before the fan
The fan inlet should have a straight duct at least 6 duct diameters long in front of it. An elbow at the fan inlet makes air enter the wheel unevenly and swirl, so the fan performs below its catalogue rating. Where space is genuinely tight, use a tapered inlet or turning vanes, and consult the fan manufacturer.
5. Blast gates in the right place, and locked
- Install them at least 5 duct diameters away from elbows or other disturbances.
- If they are used for balancing, put them in vertical duct runs, roughly halfway between the hood and the next junction.
- Once adjusted, lock them in position. Otherwise someone will turn them and starve another hood of air.
6. Cleanouts
Fit cleanouts near horizontal runs, elbows, junctions and vertical runs. For ducts up to 305 mm, space them no more than 3.7 m apart. Every end of the main duct should have a removable cap so the duct can be cleaned without dismantling it.
7. Hangers sized for a duct "half full of dust"
Design hangers to carry the duct plus the weight of material filling half of it, because sooner or later dust will build up more than expected. Do not let the duct load rest on hoods or machinery. Use flexible duct only where necessary, choose a non-collapsing type, and keep it as short as possible (about 0.6 m at most).
Site checklist summary
| Item | Criterion |
|---|---|
| Elbow radius | 2–2.5 duct diameters |
| Branch entry angle | 30° (no more than 45°) |
| Contraction length | At least 5:1 |
| Straight duct before the fan | At least 6 duct diameters |
| Blast gate distance from an elbow | At least 5 duct diameters |
| Cleanout spacing (ducts ≤ 305 mm) | No more than 3.7 m |
| Flexible duct length | As short as possible, about 0.6 m at most |